Back Mobe
Back Mobe is an unhooked back loop followed by a handle pass in the same direction as you travel. So in essence you´re doing a 720, two full rotations from the carve. The major problem people have when they try to perform this trick that they´re not sure if they are doing one spin, two and a half spins, one and a half spins or two spins, it can all become a bit confusing in the air.
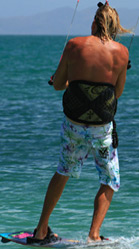
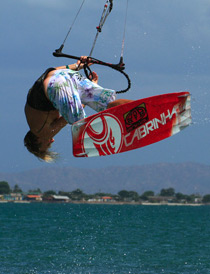
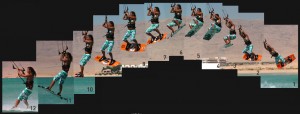
Knowing this the fundamental behind a back mobe is a decent pop with a slow rotated back loop. The image below shows what we are aiming for.
I t doesn’t matter if you land toeside or heelside. Your aim is to end up with your hands and hips together and your body fairly horizontal as you complete a full rotation. The key elements here are to keep your arms bent and bring your knees up. However there are many building blocks which don’t all follow the same path, so lets have a quick look at two of the most popular roots.
The back to wrapped. A great move in its own right and a potentially good lead into the back mobe. Only thing going against it, is if you are deliberately keeping the kite low to help you around the rotation, you will be throwing yourself around, trying to over rotate in order to land wrapped, which will do nothing for your pop or kite control. On the positive side it teaches you to hold onto the bar once you´ve released your back hand – this is a good thing!
The back to toeside. Yet again this can be a great step up to the back mobe but only if you see the toeside landing as a comfy alternative to a heelside landing. It´s very tempting to keep the kite low, say around 45 degrees and really throw yourself around. Once again you won’t be working on pop or controlling your rotation.
We want to try and get some elevation with our back loop from our back leg and we want some time in the air. To make this all a bit more achievable you´ll need to have your kite just under 11 or 1 o’clock, about 75 degrees if you´re into angles. The danger is now that you´ll spin under the kite so you need to work on how you rotate, the axis, and this is what takes the practice. By looking at the individual parts of the back mobe we’ll hopefully uncover how to get there in a controlled fashion.
So lets guide you through the steps.
The single most important part of the set up to a controlled unhooked popped back loop. To bear away off the wind and unhook you must bend your back leg and really move your hips towards the tail of the board, pushing the nose off the wind. This way his weight is already where it needs to be to get a tight but quick carve upwind. Try not to carve off the wind on your toes as this will move your weight forward, making it much harder to resist against the kite and pop. But do make sure you go off the wind enough before carving up as otherwise you´ll take off too late, spin too quickly, and won’t have time to think.
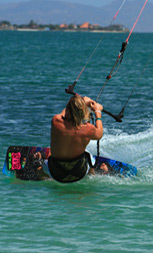
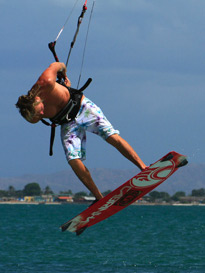
Carve hard upwind to initiate the back roll. Note that the front leg is fully extended, toes up to keep the front foot from pulling out of the strap, whilst your back leg is flxed and ready to pop. Even though your shoulders are leaning back into the rotation which will help you get horizontal, your hips are twisting upwind to allow you to resist against the pull of the kite, which keeps the board in between you and the kite and will let you pop off the back leg.
Firstly getting some up from the pop. Having initiated a good carve as in picture 2, kick down of your back leg before you get pulled over the board and it turns through the eye of the wind. Secondly keep your arms bent. This will allow you to rotate your hips towards your hands. If you had straight hands you wouldn’t be able to get your hands and hips together by the end of the back loop as the distance between them would be to great. Finally keep your head firmly between your shoulders and look forward. By not looking over your front shoulder you should rotate at a controllable pace, using the momentum from the carve to turn you. This means that you can save the energy from your head and use it slightly later on when you´ll need it.
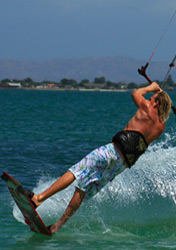
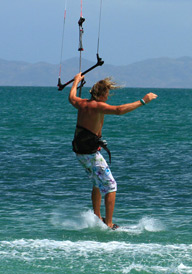
At this picture you are just about to finish your back loop. You can see that because your arms are bent the bar is not to far away. Imagine where the bar would be with extended arms… yup, no chance! This is where the practice pays off, as you need to anticipate this moment just before it happens. The more slow rotation back loops you do with bent arms, without trying to pass, the more time you will have to think as it seemingly happens slower and slower, and therefor the greater chance you have of pre-empting this moment.
Just as you approache this moment, you throw your head and shoulders down and around, which has the effect of rolling your hips up towards your hands. By keeping both hands on the bar you will have the strength to roll your hips up to the bar towards your hands as your head and shoulders go down, which in turn starts to twist the bar around behind your ass. Its really important that you don’t pull the bar into your hip with your back hand as the kite will rise and pull the bar away from you when you go for the pass.
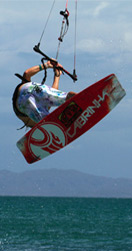
You will know when to let go because you´re arm will be in the way! The main difference between learning the back mobe and watching the pros do it, is that they will be letting go so much earlier than you´ll get away with at the beginning. If you´re a bendy kid your limbs may let you pass some distance for your body, but if you´re a grown adult, keeping the bar in close for that little bit longer makes life considerably easier. You can see here a similarity between the secret of many pass moves, the bar is already twisted enough to grab as you let go. This allows you turn more, and more quickly and means that you don’t have as far to reach with your free hand. You can help yourself here by keeping your knees bent which will stop the board from dropping and dragging you away from the kite.
Nothing too complicated here as the bar is waiting for you so you don’t let go. Keep both hands on the bar for a split second. By holding on you can rotate around your arm and therefor keep the bar nearer for your reaching hand. If you let go a fraction too early the bar will ping away and you´ll miss it. However the speed ay which you reach around to grab the bar is the key. You want to take the shortest and quickest route around your waist with as little movement as possible. If you’re already claiming Shifty 3s you should be used to this, but if you´re new to passes practising passing a bar behind your back on dry land will serve you well.
As you can see in the picture, the front arm is bent. Its all good and well passing the bar with wnough height to land, but it won’t mean jack shit unless you sail away. A nearly will give you confidence but a landing lets claim it as in the bag. By keeping your arm in after passing, the kite will pull you around enough to land comfortably at speed on a flat board. If you let your arm pull out straight the chances are you just won’t turn enough and you´ll get pulled over the nose of the board when you land. This can be the most frustrating part to conquer. After you pass try and bend your arm from your elbow so that your hand comes towards you shoulder rather than pull your hand in towards you.
Top Tips
Once you´ve obsessed about back loops with a slow rotation and are ready to go for the pass, really try to visualize the movement of one slow back loop followed by a second very quick off axis rotation. As Walt Disney said, “if you can dream it you can do it”.
If you have a tendency to list the kite as you go to pass try pushing down on the bar as you turn your head down. With the bar twisting down towards the water this pressure will stop the kite from moving.
Summary
- With the kite around 11 o’clock and weight well back over, carve hard into wind with your hips and shoulders, explode up from your back leg into a slow back loop.
- Keep your arms bent and hands close as you leave the water. Look forward.
- Bring up your knees as you start to rotate.
- Three quarters the way around your back loop it’s time to start use your head.
- As the back loop is completed, throw your head down and around towards the water to initiate the pass, but hold onto the bar with two hands, twist it around you so that you can roll your hips up to the bar.
- As your hips rise and meet your arms, release the bar with your front hand.
- Swing your free arm around and in front of your waist and continue to twist the bar around behind your back.
- Reach back around your harness.
- Rotate around your back arm until you can grab the bar with your front hand.
- Once the bar is grabbed release your back hand.
- When you drop lift your head to keep your weight over the board.
- Lift your left hand towards your shoulder to stop your arm from extending and pulling you off balance.
- Land over a flat board, reach around to grab the bar and sail off.
Common Problems
Your kite drifts up fast as you try and bring your hips up.
This is most likely caused by you trying to pull the bar down to your hips rather than bring your hips up to the bar. Try hold the bar with both hands and use the movement of your head and shoulders dropping to pivot your hips up.
That said splitting the fingers of your back hand over the centre line will help to keep the kite from moving up as you go to pass. And if you feel you must pull the bar in make a conscious effort to steer the kite down with the front hand as you pull.
You land on your board still moving, but you didn’t manage to grab the bar. This is a classic for riders getting into the mobe.
The reason for this is likely to be that you are trying to throw a double rotation, rather than control a back loop and then pass. As a result you are spinning on a more vertical axis, your hips won’t roll up and you have no chance to get near the bar. If this is happening to you, go back to the slow back loop and try to separate the two rotations.
You always pass, land and then fall.
This was a personal favourite and has everything to do with not holding the bar in once you´ve passed it. If your arm just extends like rubber you´ll get pulled off balance as the board brakes on impact. By keeping the hand nearer to you with tension on your front arm you and the board will move forward on touch down.
Keystones
- Carve hard with weight back to initiate back loop.
- Look forward for a slow rotation.
- Head and shoulders at end of first rotation.
- Hold on with both hands until hips up.
- Hold on with back hand until you grab the bar.
We end this article with a nice little video from Progression Me
Foot Air Gybe
Foot Air Gybe
We all like to show off now and then and sometimes the simplest of things look and feel good. The Foot Air Gybe is one of those tricks and besides a trick that you can learn without being afraid of ending up doing a face plant.
Before you start trying making a foot air gybe it’s recommended and somewhat taken for granted that you already master the air gybe. It´s also a bonus, but not a must, if you already have done your first one foot jump. The advantage of having done some one-foot jumps before is that you know the necessary movements to get your foot in out the foot strap and still land with control.
Before we go through the key parts of this move let’s make sure that you understand what the foot air gybe is all about. Coming into an air gybe you take of as usual, then release your front hand, grab the heelside edge of the board at the back of your front foot or wherever you find it comfortable, slip your foot out of the strap, before then turning to face the other way, replacing your foot and diving the kite and sailing off in the opposite direction.
Approach and take off
This part of the air gybe differs from that of a normal jump because you don’t want to be flying through the air at high speed. If you do you´ll end up pendulum under the kite and it will be very difficult to land and travel in the other direction.
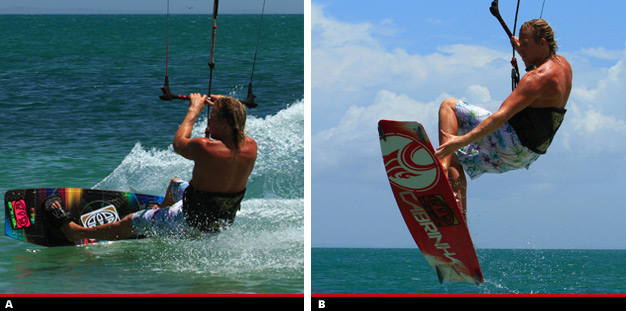
In picture A you can see how you should carve up in preparation for the take off, similar to a jump. The difference is however that before you send the kite you have already carved up against the wind. By doing this you kill off any unwanted speed, so that when you jump you will only go up, not forward.
Also make sure that your back leg is quite bent so that you´re ready to go early and up as soon as the kite starts to lift. Finally be sure to put your hands close to the middle of the bar, so that you´ll be able to steer the kite with one hand.
You should still approach the air gybe on an edge and with some speed as you need power in the kite. The kite should be positioned at around 11 or 1 o’clock. Then carve hard into wind by looking over your front shoulder, twisting your hips upwind and pushing down on your back foot.
Even though you send the kite hard you need to pre-empt the take off rather than wait to be lifted up of the water. So once you have sent the kite, as soon as you feel it starts to lift, rather than resist more, jump up off your back foot to get in the air. As you do this you can then bring your hands to your hips, which not only gives you some extra lift but also brings the bar parallel with the water, which stops the kite flying too far past 12 o’clock.
Grab and Fly
In order to be able to reach the board with your hand you need to bring your front knee and foot up as soon as you take off. At the same time you need to maintain the float from the kite by keeping it above you, with tension in the back lines. This would be the same as getting into the big chill position of a normal air gybe, where you bring the knees up, pull the hands down and keep looking forward in the way that you were going.
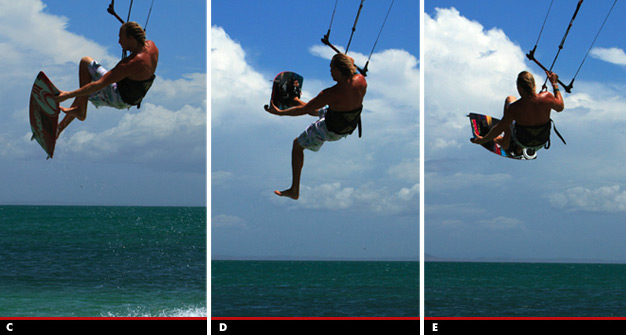
In picture B you can see that the jumper has brought his front knee up so that the board is within easy reach. You can also notice that he hasn’t brought up his back leg as much, this way the board is angled up towards, making it easier to grab. He also looks at the point of the board where he intends to grab the board, which will make the process quicker. You can also see that he has his back hand right up close to the chicken loop. In this position you can pull down on the hand to keep the kite above you in the big chill position. The final thing to take notice off is the fact that the jumper has kept himself upright and has not rolled back to get his feet back.
If you roll back it’ll be hard to keep the bar in and hard to get your foot out, meaning that you´ll drop quicker and struggle to have the time for any fancy footwork.
Slipping Out
The simplest way to get your foot out from the strap is to push the board away from you, so that your arm is doing most of the work. The benefit of watching your foot also enables you to keep looking forward, which is one of the most crucial ingredients for a good air gybe.
In picture C you´ll see that the rider has pushed the board away from his foot by extending his arm. At the same time he pulls his foot back towards his bum and bingo, out slips his foot. At first this is all you should aim for, a quick out and in. If you look at his bar you can see that the bar is still pulled in, so the kite is still supporting him even though it has drifted slightly past 12 o’clock.
Hang Time
Once you have confidence you can go for a bit more extension, just to make sure that everyone and anyone can see that you’ve ditched the foot. As long as you have the bar in and the kite is still relatively above you, you’ll be supported and have time for such showmanship. Keep your board arm extended as this will make getting your foot back in easier.
To increase awareness of this move you can see in picture D that the rider has straightened his leg. Much like a 1 footed jump if you try and push your leg down towards the water it will straighten easily.
Putting your foot in it
Throughout this move, unless you’ve been trying to stare into a camera lens or catch the eye of someone special, you’ve most likely been staring at your hand and the footstrap. By looking this way it will help to stop you drifting the kite too much behind you and it will make sticking your foot back in a synch. Use your hand and arm to pull the board back onto your foot.
That said if you look at picture E you can see that the riders kite is certainly starting to drop the other way. However because he has kept the bar in the kite will pull rather than flutter down the edge of the window. When you feel the kite start to pull from the other side it is a warning that you need to get your foot back in and you need to dive the kite hard to pull you out of the trick.
As soon as you feel that your back foot is going into the strap, start to pull on your bar hand hard to dive the kite.
Touch Down
Now just like landing anything your aim is to get power in the kite so that it’ll pull you down wind, enabling you to land on a float board, off the wind and with some speed.
Tips
As always before performing a new trick, refresh your body memory by making a few good air gybes in preparation for the one foot air gybe. Once you’re comfortable with the air gybe move on to some grabbed air gybes and finally slip out your foot. One good thing is to wiggle your foot a bit before you settle in for the foot air gybe, just to make sure that you can easily slip out when it’s time.
Good Luck!
Unhooked Jump
Jumping unhooked requires all the same core skills as jumping hooked in. In a way it’s a great method of finding out your strenght and weaknesses and to some degree it may improve your hooked in aerial adventures.
The most obvious and main difference is the take off. Without the ability to sheet the bar out as you approach there is a possibility that you´ll get overpowered before you have the chance to stelle into a nice strong edge against the pull of the kite. To make matters worse, if in anticipation of this overpowered-ness, you trim your kite just a bit too much you´ll end up with no power and not a hope in a hot place of flying.
Anyway, let´s move on to the technique!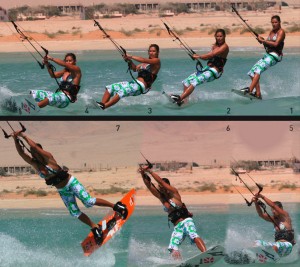
- With the kite around 11 o’clock and with good board speed you push the nose of the board off the wind. Extend your front leg and let the kite pull you up over the board. Now that the board is pointing at the kite there should be some slack in the lines so you can unhook.
- Push the bar down so your chicken loop can fall free (remove the donkey dick if you havn’t already done that). Don’t look down since this can make your shoulders come forward.
- Now send the kite back and drop your weight back over the trailing foot, pushing the board away from you.
- Twist your shoulders and hips upwind and drop the body weight upwind of the board, resisting the pull of the kite by pushing back with your feet. Your front leg is still extended and try to keep your elbows in near your waist.
- As your arms get pulled up it’s time to get airborn or you’ll just be pulled over the board.
- Explode up off your back leg, pushing your heel hard against the edge for that last bit of resistance.
- The kite wins and you are plucked into the air. As you rise pull down hard on your front hand to redirect the kite and stop any unwanted pendulum activity.
Alright, so we are now airborn. Let’s move on to the next steps.
1. Concentrate on redirecting the kite with your front hand. This is very important and requires much more effort than you can imagine.
2. Still on the way up start to lift your knees whilst steering the kite back above you.
3. Now you should have the board in front of you and you should start feel more balanced and in control.
4. As you approach the apex of the jump the kite is not lifting so much so you can start to pull down on the bar.
5 & 6. At the very top of the jump you should now have managed to pull the bar down to you and from here you can focus on the landing.
7 & 8. As you start to descend try to bold your position and keep the kite flying forward.
9 & 10. Drop your legs and start to hang off/pull on your front hand to get the kite diving down.
11 & 12. Just before the landing point your board and drop your back leg (eg. whilst still diving the kite down with your front arm. Yet again you’ll need to put a lot of effort into the dive, as the kite will not respond like you’re used to)
A perfect landing off the wind. Now you can gather your thoughts, hook back i, carve the board up and across the wind and fly the kite.
Common problems
- The first most common problem is getting pulled off your edge during the take off. If you look at the kite, it twists your body back across the wind and results in you being lifted over the board and loosing your edge. Try to get really low and keep your elbows tucked in. This will be easier if you lean your weight back as you bear away to unhook, as then when you suddenly carve upwind your front leg will be straight and your weight will be low. Once you feel your arms start to extend pop up, as this is definitely the last moment possible to slavage your jump.
- Redirecting your kite when you take off and diving it as you land is much harder hanging from a bar with your hands in the middle. As a result you may find that on take off it’s very hard to get the kite back above you, so you pendulum and drop. If you hold your edge and jump before you get pulled forward this will help. Try using both hands to steer. So if you want to pull on your front hand, push away with your back hand. The result is a turning of the wrists, which will make lfe considerably more pleasant.

