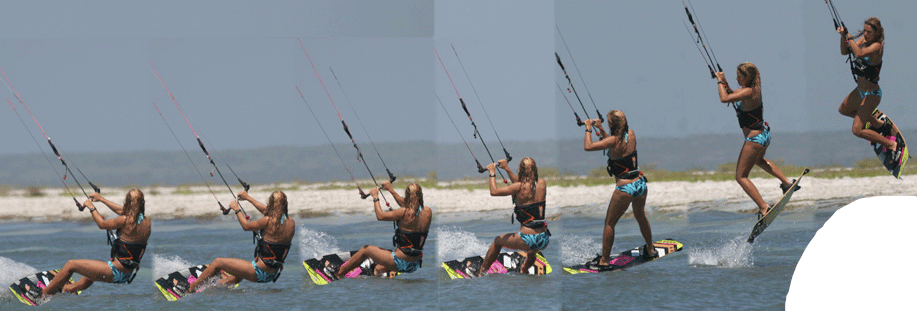
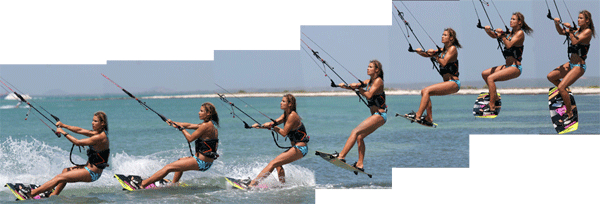
Front Loop to Wrapped
Front Loop to Wrapped
This is a blind move for any aspiring freestylers. The “Front Loop to Wrapped” is an attainable pop move for anyone landing Shifty to Wrapped, also doubles your way to get into a non-inverted slim. Theoretically if you can perform a controlled unhooked front to toeside, then this move is just your step away.
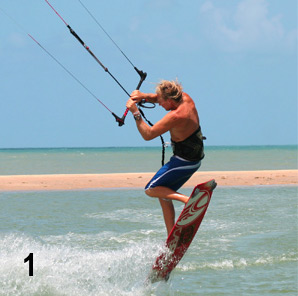 Pic 1 – From a front loop to toeside, you can see that the surfer has carved a long way upwind before popping. The result of this is that, regardless of how hard the fronts roll initiation it will have a stalling rotational speed effect at the start for the surfer to pop up into the rotation if needed. In short the surfer’s hands, bar and even the board are the way to a 360 degree rotation.
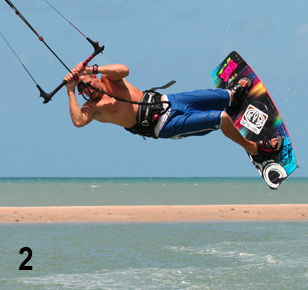 Pic 2 – You can see that the surfer’s head and shoulders have all but completed rotation. The legs however are trapped in a time warp and are following some way behind. The point here is to forget your legs and as long as you are ready for the landing with your head and shoulders, the board will drop down toeside.
Building Blocks
Approach
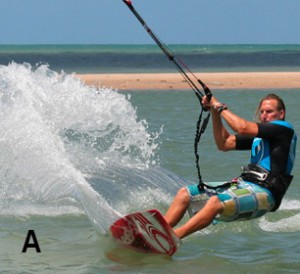 Pic A – This should be a familiar scene for many of you, as we are the usual ingredients for good unhooked pop. The surfer has the kite parked somewhere 10:30 and 11:00 o’clock and carving hard upwind with the bum low, shoulders, back and arms are bent slightly. The bent arms are is a must to do this trick. The surfer’s front leg are pretty extended with hips over the back foot and back leg resisting for preparation to pop off once carving into the wind is applicable.
Take-Off
Pic B – During the take-off you need to keep your arms in close. Popping up will make this a lot easier. You will also need to get the kite where it should be as the chances are it will rise slightly during your carving stage. Here you can see the surfer has popped up hard off using the back leg with hands close to the bar. The surfer has also steered the kite down a little by pulling on using front hand, which also helps the initiation of the rotation combined with dropped front shoulder at the same time to turn swiftly.
Waiting
Pic C – This picture sums the move up and also demonstrates the similarity between a shifty to wrapped, shifty 3 and the front to wrapped. With the rotation on going, the surfer focused on where to land while feet are catching up but still behind position. The objective here is to wait until you feel that your feet are dropping down because that is the sign to go for the wrapped. Timing is very important.
The Pull
Pic D – As mentioned, you’re the dropping of your leg is the signal to go for wrapped. The reason is you will be using the momentum of your dropping legs to bring them through and up to turn to a wrapped. Once they start to fall – use them!
The surfer here has reaction to the legs because of both hand pulling hard and aiming to go past the right hip while bringing the back (right) leg up towards the bar. If the kite is too high, the lift will make the landing and passing difficult. When pulling on the hands, it is a good idea to give the kite a little tweak down because it can make the rest of the move much easier. As soon as the surfer’s back knee comes up, other knee is bent, turn head with the rotation and let go with front hand, thus allowing the surfer to turn with the momentum on going.
The Landing
Pic E – Your aim is to get the board at least downwind but preferably a bit further around, so that you will keep your speed and move towards the kite to make the pass out of wrapped much easier. Continue to turn your head to look where you should be going. In the picture, the surfer almost has too much weight back, which can lead to bouncing on landing. As you come down, even though you released your front hand, you should carry on pulling the bar behind your back with your back hand and twist your wrist. This will place the bar correctly, and it will wait obediently for the pass.

Step by Step Sequence Summary
1. The surfer bears off the wind considerably, unhooks, drops weight and starts to carve into the wind.
2. The surfer aims to carve a long way up into the wind and keeps the hands in close.
3. As the kite starts to pull, the surfer pops up hard by extending back leg with all might while pulling hands down towards the body.
4. The surfer initiates the rotation by throwing front shoulder down towards the water and at the same time dips the kite by tweaking it with front hand.
5. In this position, the surfer can now rotate the head around, looking back over the trailing shoulder which will guarantee him enough rotation to get the way around the first loop.
6. With eyes focused on where to land, the surfer waits, timed, and doesn’t try to land quickly then he brings the legs around through the landing position.
7. As the legs start to drop, the surfer pulls hard on both hands, trying to rip the bar past the back hip, at the same time bringing the knees up towards the bar.
8. The surfer releases front hand and turns the head while keeping the knees up. Remember to twist as this will make your body rotate much easier.
9. Coming in for the landing as you can see that the surfer has the bar and wrist turns and ready, he turns the head to try and look where to land giving weight forward over the board.
10. The surfer lands with the board facing slightly off the wind and the arms wrapped around behind.
11. All that’s left to do is to reach behind with your free hand and pass the bar. The further you rotate the quicker you will need to do this as you will have more tension on the lines and the kite will rise.

Tips to Remember
1. Edge hard upwind
2. Keep hands in
3. Pop up over your hands to rotate
4. Lead with head and shoulders
5. Pull both hand hard past your back hip
Air Gybe with Late Kite Loop
Air Gybe with Late Kite Loop
This technique is really much a cheat as it is a trick, and a very handy one. A late kite loop in this case means that the kite loops once you are on the water, not in the air. Perhaps you’ve already seen it many times before. The fact of the matter is when your kite control goes southward while altering direction in the air, doing this will provide you a nice bit of pull.
An upbeat outlook would predict several more advantages of combining this to the humble air gybes. It’ll give you the chance to hold them for longer and rack up the style points while still bursting with speed. On smaller kites, there is more chance of steering your kite too far behind and this yet against is a perfect answer. More retro pop transitions often result in you swinging away from the kite. Once more, this is the cure.
To cut it short, if you sometimes find your kite low and way to the side when you’re hoping to plane out of a transition, this trick will give you a handy boost of power right where and when you need it, and those days of sinking down will totally be gone. And finally, this can be an exceptionally comfortable way of building up yourself trust and skills in anticipation of a winner kite loop. Warning though, if you have never voluntarily looped your kite, we would strongly suggest learning the under turn first.
BIG POINTERS
As with any attempt to air gybe, it will still benefit you to try and get the basics right and add the late kite loop onto the end rather than try to apparently fluff it. We will be repeating ourselves to save you looking elsewhere.
Pic A.
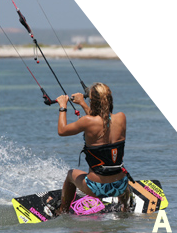 The surfer is about to take off and has approached with speed and kite not lower than 1 o’clock. To drop speed, you need to carve into the wind by putting weight over the rear foot, moving the hips towards the tail of the board and extending the front leg. The straight front leg keeps the board on its edge. The surfer has already steered the kite back aggressively and has the bar pulled into the spot where here back lines are tight. From this state, you can jump up off the back leg into the air gybe.
Pic B.
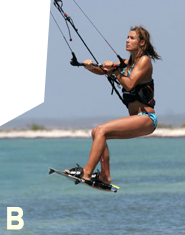 Now the surfer illustrates dropping back down towards the spot landing. You must be well balanced in this position. Have the board pointed off downwind by pushing your new front foot away while keeping the rear foot underneath. You need also to dive the kite hard to get it moving down in front rather than letting it drift slowly to the side. This way, it will pull you out of your free fall and get on moving as soon after landing.
Pic C.
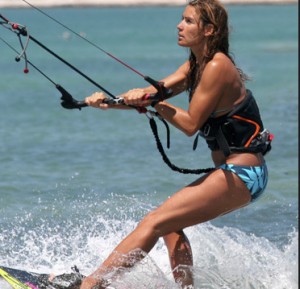 However, this is where it all changes from a regular air gybe to one with a late kite loop. Normally, assuming that you had dived the kite enough to ride away as soon as you land, you would be pulling hard on your new back hand in an effort to stall your kite crashing straight down into the water and turn it back up. Rather than steering the kite back up, continue to pull with the front hand, in fact pull even harder. This means that the kite keeps turning under itself and does not hit the water. As long as you keep pulling, the kite will start to rise and then turn forward in the desired path. To make this fun, keep the bar pulled in so that the kite continues to turn. Keep the board pointing off the wind and keep your weight back over the tail of the board.
If you have another look at the video, you’ll see that the kite is diving straight down as if the surfer was landing an air gybe, but upon touching down, the kite goes under and around by pulling it a bit strong, dragging the surfer nicely along to the left side.
THE GREEN LIGHT
Once you’ve decided to do this, there are a few good ways of getting you warmed up. Firstly, practice a couple of under turns. If you’ll be going for this air gybing on your right, do the under turns on your left and vice versa. Now, you’ll be confident enough that the kite will go around.
Secondly, knock off a few air gybes and focus on diving the kite hard for your landing. If this feels comfortable, try watching your kite as it dives down. So basically, turning it one way or the other shouldn’t make any difference.
SEQUENCE 1
In these images, the surfer is using a 7m Nomad, which turns fairly quickly but won’t give her a massive amount of hang time. The surfer has the advantage of a kite that will loop with only a little positive input on the bar. But the disadvantage is that, the preparation for landing in a big chill position is cut short.
1. Making sure that there is no one at the back and could have more space to party. The surfer carves hard into the wind and sends the kite back. Weight back, front leg straight and bar close in.
2. As the surfer feels the kite starts to lift up, the next thing to do is to stop steering the kite back and places the bar at center parallel to the water. Still keeping the bar close in
3. The surfer then explodes up off the rear leg rather than waits for the kite to pull up, and pulls the bar right in – hands to hips.
4-7. Upon take off, the surfer tries to get the kite back above at 12 o’clock by keeping the bar level and keeping the tension on the lines by keeping both hands close and arms bent. Also the surfer starts to lift both knees up for stability. Now, it’s the big chill – keep this position up until the tip of your jump and wait until you drop.
SEQUENCE 2
1. As soon as the surfer feels like dropping, the surfer dives the kite hard with the new front hand, the left hand.
2. To make sure to have full control over the kite, the surfer keeps the bar in close, and thus has tension on the lines, so the kite will react whenever wanted/needed.
3. In readying for the landing, the surfer pushes the front leg forward and keeps the rear leg underneath. The scissoring of the board will point the board downwind. The surfer keeps sight on the kite as it wanted to be diving down.
4. Just before touching down, the surfer drops the legs to take the landing, the whole time the surfer has the bar pulled in and is still pulling on the front hand. Pulling off the can be of help to land downwind.
5. As the surfer lands, the board continues downwind. It would stop if you land on an edge, not ideal when the kite is about to generate more power. To compensate for any extra force, the surfer puts weight over the back and front leg extended.
6. Because the surfer has kept pulling, the kite has turned under itself and back up. Because the board is facing downwind, there is no abrupt pull, just a smooth acceleration out of the landing.
7. As the kite turns forward towards the new path, the surfer carves back onto the edge by pivoting the hips and shoulders further around to face which direction to go. The surfer also halts on pulling on the front hand, as another loop would be unnecessary.
USUAL PROBLEMS
There are several possible causes…
If you keep dumping the kite into the water while you land balanced and over the board.
- If you are not 100% committed to what you will be performing, looping the kite once you have landed, it is very tempting to let the bar out as soon as you feel a little pulling force from the kite, as it starts to turn under itself. Once you’ve released the tension from the back lines, even steering hard won’t keep the kite moving round. The answer is absolutely get some under turns and hard diving air gybe exits under your belt and then merge them up.
- You may not be actually steering the kite good enough. On larger kites, you may need to move what will be the new front hand towards the end of the bar to provide you the power to really pull the bar in.
- If you are landing with your kite unusually low to the water and to the side where you came from, and want to go back to it will not have enough room to turn under itself. The higher the kite starts the loop, the easier it will be.
If you find out that you are getting dragged off balance in the air.
- Chances are, rather than considering this as an air gybe, you’re more into super loop territory. Remember to get the kite back above you so that you’ll be in good terms with it at 12 o’clock. This way, the pull will come more from downwind and less likely from behind you.
- Timing is key. You need to be diving the kite at the same time you would for landing an air gybe just before touching down. If you pull too early, the kite will try and turn under itself while you are still up in the air, also known as kite loop which you can learn onto, but focus more on the late kite loop timely.
Lastly, if you are getting pulled onto your face when the kite loops, make sure you’re not edging against the pull AND put your weight back with your front leg extended.
KEY POINTS
- Edge then send
- Big chill
- Wait and dive just before landing
- Point board off wind, weight back
- Keep pulling with new front had
And the video…
